Mizuki Clubman Turbo

Collapse
X
 
  • Filter
  • Time
  • Show
Clear All
new posts
  • DVO
    Senior Member
    • Oct 2009
    • 553

    Mizuki Clubman Turbo

    I think this is the time to open a new thread here, because last week I finally started my own Suzuki conversion. I have been reading along already for a while getting ideas how to tackle this.

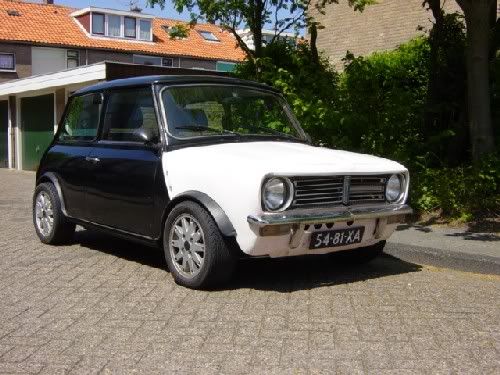
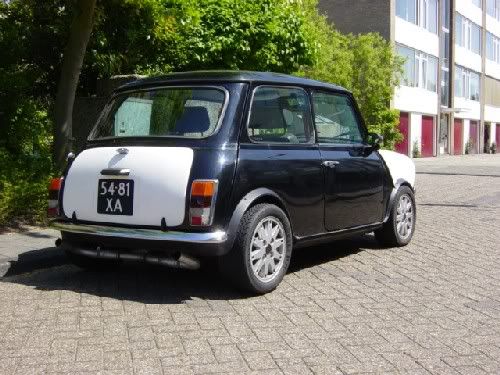
    The donor car will be a 1973 Clubman with polyester front. I built this car years ago to be fitted with a Metro Turbo engine. Unfortunately I blew up the engine after 200 kms. I was so fed up with that that I sold the car to a friend 3 years ago.

    This year he said that he was going to sell the car and very quickly I decided to buy the car back to turn it into a street/circuitracer with A-series engine. But shortly after I that talked to somebody who was going to do a Suzuki conversion.

    First he was going to do the subframe for me, but due to circumstances that never materialized. By then I already bought a wrecked Suzuki Swift Gti followed by another one a bit later.

    The only solution was to start myself. I can do some welding but I am not an ace at it, the result maybe does not look that great always, but I think strong enough.

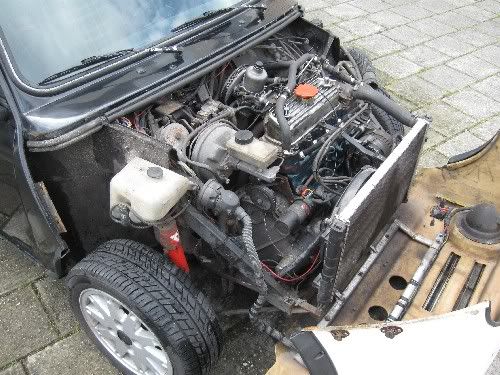
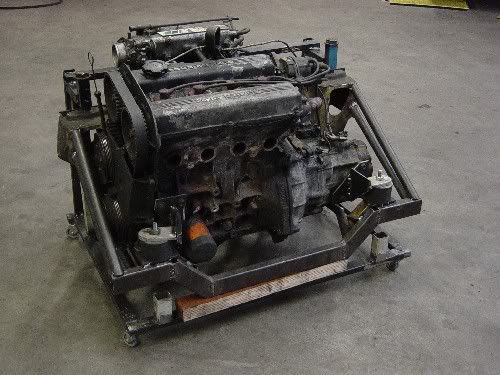
    When the decision was made to give it a go I decided to go a step further and bought a complete turbo set-up. So the project will be converting a 1275 Mini Clubman into a Mizuki Clubman Turbo.

    The donor car:


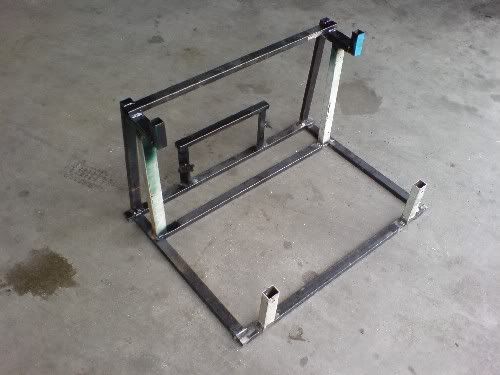
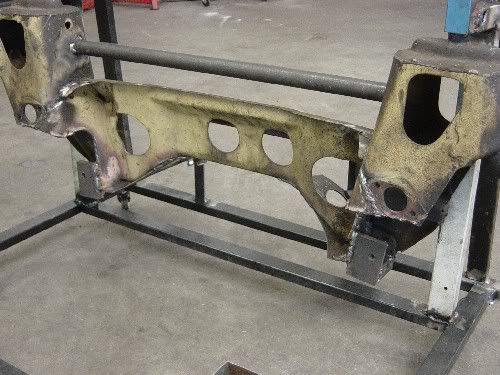
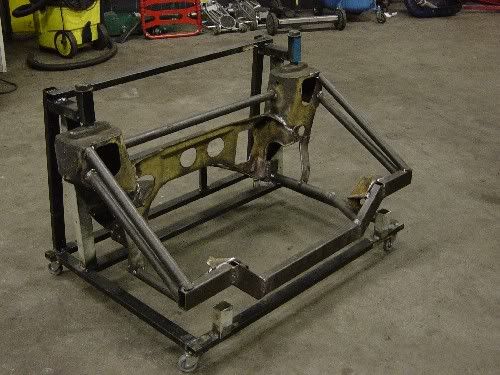
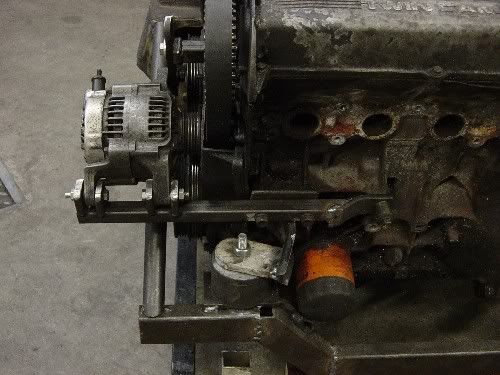
    We started by welding a jig around a standard Mini subframe:


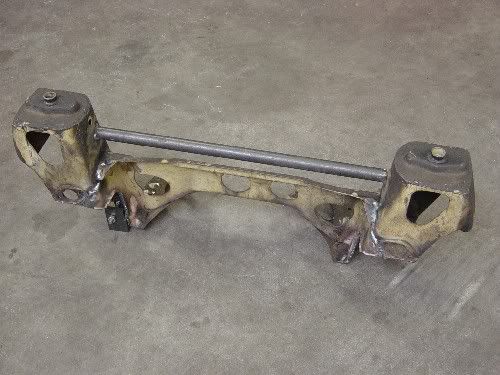
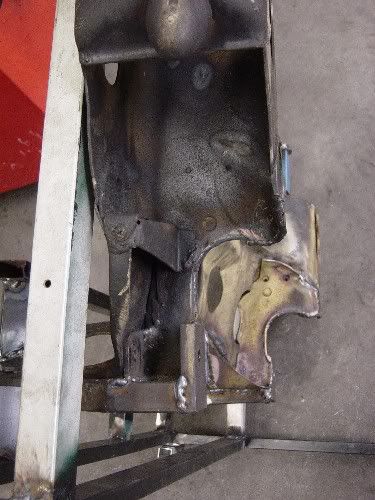
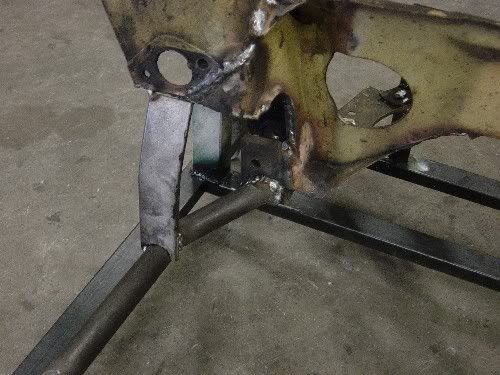
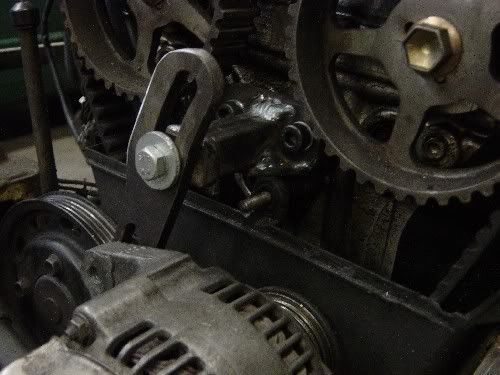
    Then cutting off the not needed parts from the subframe and seamwelding a lot of joints for extra strenght.


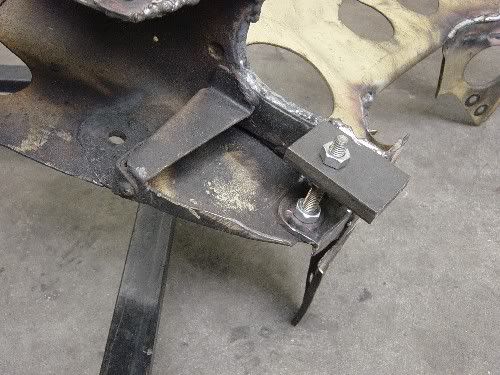
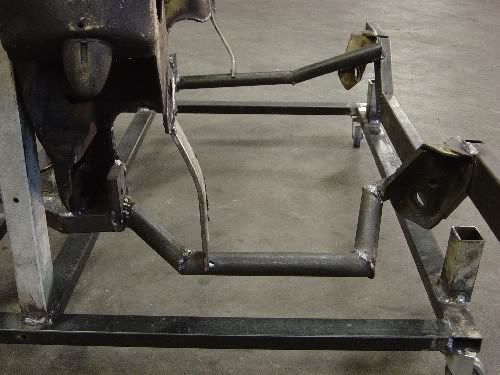
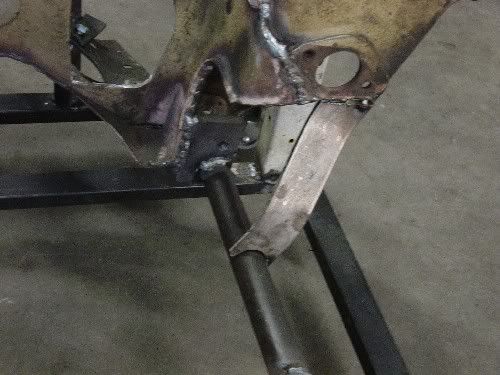
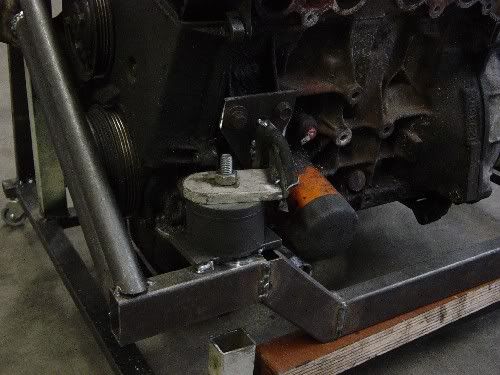
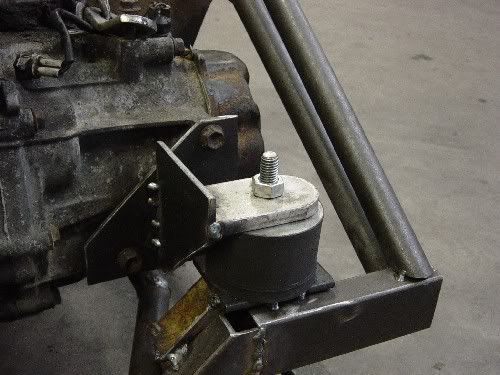
    Working on the fixings op the bottom arms:
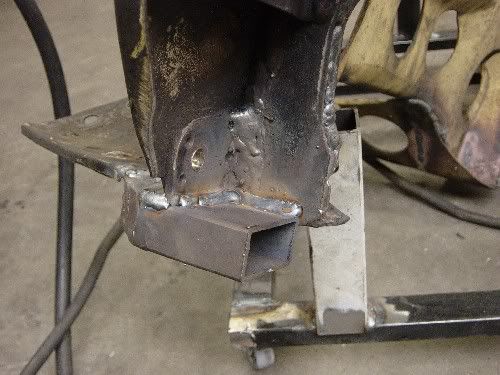
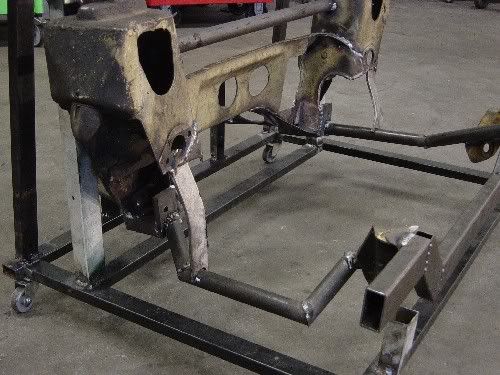
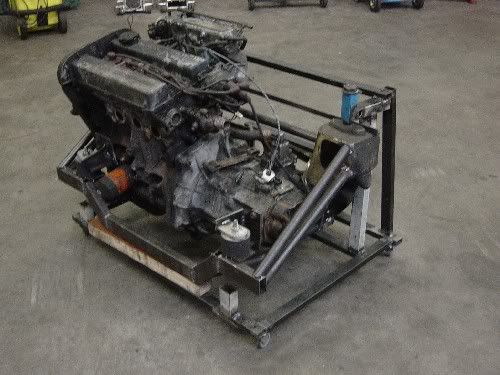
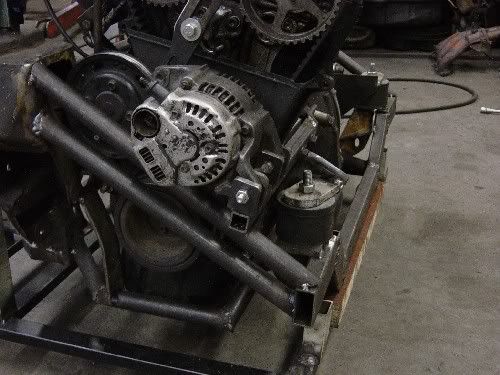


    How it looks now:


    Next week i will continue working towards the front. Because of the turbo the front bar has to be low I think but will see what is the most useful. I have a clubman front so a bit more space to work with than under a roundnose.

    Dennis
  • speedy
    Senior Member
    • May 2006
    • 579

    #2
    thats a good start.
    keep those progres pics coming...
    the wheather is perfect to be in the shed
    new engine is done...

    Comment

    • Marcus Nordblom
      Senior Member
      • Oct 2003
      • 2511

      #3
      very nice, looking forward to the end result!

      Comment

      • Welder
        Member
        • May 2008
        • 85

        #4
        Hit the road DVO!
        Car status: Bought a new shell!

        Comment

        • speedy
          Senior Member
          • May 2006
          • 579

          #5
          not yet.... build a mini first...

          jasper.... how far are you now...?
          new engine is done...

          Comment

          • DVO
            Senior Member
            • Oct 2009
            • 553

            #6
            Today en yesterday made good progress on the subframe. The bottom part is now done. Have to finish welding and will redo the left part because I think it is stronger when I weld it against the front beam instead of on top of it.

            Today I got the enginesupport rubbers so I can continue also with making the engine mounts. Will be a lot of fiddling around I guess from what I heard.

            Dennis


            Comment

            • DVO
              Senior Member
              • Oct 2009
              • 553

              #7
              Today not as much progress as I would like, because I made a mistake with the alignment of the bottom arms. That took a while, but now that is sorted out too. Changed the left hand bottom of the frame a bit and welded in the tower to front bars.

              Dennis

              Last edited by DVO; 18-11-2009, 05:18 PM.

              Comment

              • speedy
                Senior Member
                • May 2006
                • 579

                #8
                nice and tidy...
                new engine is done...

                Comment

                • DVO
                  Senior Member
                  • Oct 2009
                  • 553

                  #9
                  Yesterday and today worked on the enginemounts. I think I got it more less right. I am very happy with the result especially the one at the back gave me a lot of problems with figuring out how to do that.

                  I wanted that as high as possible to prevent the tilting of the engine but also supported as much as possible because it gets a lot of strains on it.

                  When I got al in I think I forgot something. The engine is level, but it is not straight in the subframe. How is it possible to measure that, because there are not really fixed points on the back of the engine to measure from.

                  I was thinking of taking off the inlet because then I have a straight line on the cylinderhead and then measure along the back of the subframe. Somebody any other suggestions?

                  Dennis


                  Comment

                  • Spiyda
                    Senior Member
                    • Sep 2007
                    • 1916

                    #10
                    Originally posted by DVO View Post
                    Yesterday and today worked on the enginemounts. I think I got it more less right. I am very happy with the result especially the one at the back gave me a lot of problems with figuring out how to do that.

                    I wanted that as high as possible to prevent the tilting of the engine but also supported as much as possible because it gets a lot of strains on it.

                    When I got al in I think I forgot something. The engine is level, but it is not straight in the subframe. How is it possible to measure that, because there are not really fixed points on the back of the engine to measure from.

                    I was thinking of taking off the inlet because then I have a straight line on the cylinderhead and then measure along the back of the subframe. Somebody any other suggestions?

                    Dennis

                    what we did ....

                    temporarily fit a length of wood to the exhaust manifold mounting surface... so that it sticks out both sides of the engine .. lined up with the studs or ports (you can block it off a bit to clear the cam belt cover) then measure back to the bulkhead cross member or subfram tower mounts

                    you can use the same thing for getting it level too
                    Nothing is so simple it can't be made more complicated

                    www.spiyda.com www.screwbank.com

                    Comment

                    • DVO
                      Senior Member
                      • Oct 2009
                      • 553

                      #11
                      Thanks, that is a good suggestion, will try that next time. Getting the engine level is not really the problem but it being aligned well is important I think.

                      Dennis

                      Comment

                      • Spiyda
                        Senior Member
                        • Sep 2007
                        • 1916

                        #12
                        Originally posted by DVO View Post
                        Thanks, that is a good suggestion, will try that next time. Getting the engine level is not really the problem but it being aligned well is important I think.

                        Dennis
                        one thing , we mounted the engine so that the driveshafts werte equal lengths...if I were doing this again, I would have dissimilar lengths and mount the engine as far to the passenger side as possible (whichever side it is), it will make evening up the corner weights easier.
                        Nothing is so simple it can't be made more complicated

                        www.spiyda.com www.screwbank.com

                        Comment

                        • DVO
                          Senior Member
                          • Oct 2009
                          • 553

                          #13
                          Already read your remark about that so I did not take into account the lengths of the driveshafts. First wanted to aim for equal length, but what I understand does not prevent torquesteer anyway so why bother and make it more difficult than necessary.

                          Dennis

                          Comment

                          • DVO
                            Senior Member
                            • Oct 2009
                            • 553

                            #14
                            The engine is now in straight. I can now start on putting on the alternator (will do that the Minigarage way I think) and putting in the suspension to get some measurements on the driveshafts.

                            Dennis

                            Comment

                            • DVO
                              Senior Member
                              • Oct 2009
                              • 553

                              #15
                              Today worked on the alternator. Used the way Minigarage is doing it and that works well. Also found in the garage a bracket from an alternator that I adjusted a bit and the result is perfect. Nicely in line and easy to tension.

                              Dennis


                              Comment

                              Working...
                              X